



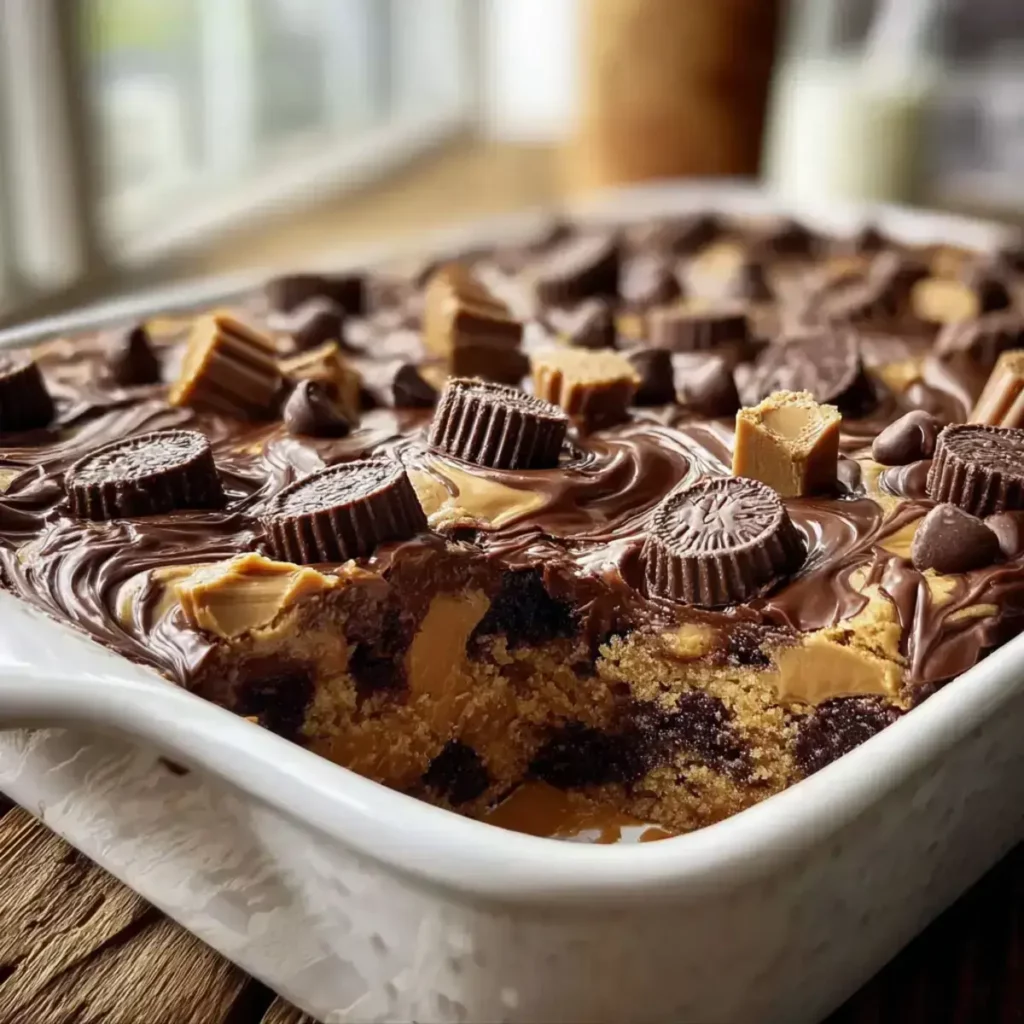
If your sweet tooth craves the ultimate fusion of chocolate, peanut butter, and pure indulgence, this Reese’s Peanut Butter Earthquake Cake will completely shake up dessert night. It’s a gloriously gooey, marbled masterpiece packed with creamy richness in every bite. Easy to bake and impossible to resist, this cake proves that the most delicious treats are the delightfully messy ones.
 Save
Table of Contents
What Is Reese’s Peanut Butter Earthquake Cake
If you’ve never met an earthquake cake before, get ready for your world to crack in the sweetest way possible. A Reese’s Peanut Butter Earthquake Cake isn’t your ordinary chocolate dessert. It’s a luscious, gooey masterpiece where cream cheese, peanut butter, and chocolate collide, creating those signature cracks and creamy swirls that make every slice unique.
As the cake bakes, the cream cheese mixture sinks deep into the chocolate batter, bubbling and shifting to form molten pockets of peanut butter and velvety filling. The result? A warm, self-saucing cake that’s part brownie, part cheesecake, and completely irresistible. You’ll spot little rivers of melted Reese’s cups and streaks of peanut butter hiding under that rustic, cracked top just waiting for a fork.
This dessert captures that nostalgic candy bar flavor in a form you can share. It’s as indulgent as the Old-Fashioned Chocolate Pie with Golden Meringue yet far easier to make. The mix of textures gooey, fudgy, creamy, and crunchy makes it a dessert worth every calorie.
If you adore desserts like Pineapple Cream Cheese Cobbler or crave that same comforting cream cheese melt, this cake is your next baking obsession.
Why You’ll Love This
There’s something magnetic about this Reese’s Peanut Butter Earthquake Cake it’s not just dessert, it’s a full-on experience. Every bite delivers a perfect storm of gooey chocolate, creamy peanut butter, and tangy cream cheese, making it a treat that satisfies on every level.
1. A Peanut Butter & Chocolate Dream
This cake celebrates the classic combo that everyone adores rich chocolate meets smooth peanut butter, tied together by a swirl of cream cheese. The layers merge into a fudgy masterpiece that’s more indulgent than even your favorite Chocolate Cake Recipe from Scratch.
2. Beautifully Messy and Foolproof
The “earthquake” effect makes every slice look unique and effortlessly rustic. Forget perfect layers or neat frosting this cake is supposed to be chaotic and molten. It’s an ideal dessert for casual gatherings or those nights when you crave something spectacular but easy.
3. Crowd-Pleasing Sweetness
A single pan can feed up to 16 people, making it perfect for birthdays, holidays, or cozy family nights. You’ll watch it vanish fast, just like the No-Bake Salted Caramel Pretzel Bites that never last long at parties.
4. Comfort in Every Forkful
Between the melty Reese’s pieces, the gooey cream cheese filling, and the warm chocolate base, this cake wraps you in comfort. It’s the kind of dessert that feels like a hug rich, soft, and soul-satisfying.
5. Simple Ingredients, Maximum Reward
No complex steps, no stand mixer needed just pantry staples and candy aisle treasures. If you can stir and pour, you can bake this. The magic happens naturally in the oven, as everything bubbles and bakes into one dreamy texture.
6. A Make-Ahead Marvel
This dessert tastes even better the next day as the flavors meld together. Chill it overnight or serve it warm the results are always spectacular.
How to Make
Quick Overview
Making a Reese’s Peanut Butter Earthquake Cake is a breeze no special tools or decorating skills needed. You’ll build layers of chocolate cake batter, a rich cream cheese–peanut butter filling, and plenty of Reese’s candies. As it bakes, the magic happens: the filling sinks, the chocolate rises, and irresistible cracks appear across the surface.
Ingredients
 Save
For the Cake Base
- 1 box devil’s food chocolate cake mix (about 15.25 oz / 430 g)
- 1 cup whole milk (or water, per cake mix instructions)
- ½ cup vegetable oil
- 3 large eggs
For the Cream Cheese Mixture
- 1 package (8 oz / 225 g) cream cheese, softened
- ½ cup (115 g) unsalted butter, melted
- ½ cup creamy peanut butter
- 3 ½ cups powdered sugar, sifted
Peanut Butter–Chocolate Add-Ins
- 1 cup Reese’s Peanut Butter Cups, roughly chopped
- ¾ cup Reese’s Pieces candies
- ½ cup peanut butter chips
- ½ cup semi-sweet or milk chocolate chips
- Optional: pinch of sea salt flakes
(You can also try swapping in the mini candies or white chocolate Reese’s for a twist it works beautifully.)
Step-by-Step
Step 1 – Preheat and Prep
Set your oven to 350°F (175°C). Grease a 9×13-inch (23×33 cm) pan well with butter or spray, or line it with parchment for easier cleanup.
Step 2 – Mix the Cake Batter
In a large bowl, combine the cake mix, milk (or water), oil, and eggs. Stir until smooth and glossy. This will form your base layer.
Step 3 – Prepare the Cream Cheese Filling
In another bowl, beat softened cream cheese with melted butter. Add peanut butter and mix until creamy. Gradually add powdered sugar until the mixture is silky and thick, like frosting.
Step 4 – Layer the Cake
Pour the chocolate batter evenly into your pan. Sprinkle half the Reese’s candies and chips over it. Drop spoonfuls of the cream cheese mixture on top don’t spread it smooth; the uneven texture creates that signature “earthquake” effect. Add the remaining candies and chips.
Step 5 – Bake to Perfection
Bake for 45–50 minutes or until edges are firm and the center looks slightly molten. Don’t worry if the top cracks and bubbles that’s the beauty of this cake.
Step 6 – Cool and Serve
Let it cool for 30 minutes before slicing. Serve warm for a gooey texture or chilled for a denser, fudge-like version.
For a little extra indulgence, drizzle melted chocolate or caramel sauce on top it’s a nod to the Chocolate Peanut Butter Bugles Recipe that’s just as dangerously good.
What to Serve Reese’s Peanut Butter Earthquake Cake With
When you pull this molten masterpiece out of the oven, it doesn’t need much to shine but pairing it with a few simple touches can take it from delicious to unforgettable.
Perfect Sweet Pairings
Vanilla Ice Cream
A scoop of creamy vanilla ice cream melting over a warm slice creates a stunning hot-and-cold contrast. The subtle sweetness balances the bold peanut butter and chocolate richness.
Fresh Whipped Cream
If you prefer something lighter, freshly whipped cream adds airiness and a touch of freshness that complements the dense texture of the cake. You can even top it with a sprinkle of crushed Reese’s Pieces for a playful crunch.
Caramel or Chocolate Drizzle
Drizzle warm caramel or dark chocolate sauce over each serving to highlight the gooey layers underneath. It gives every forkful a glossy, bakery-style finish that feels indulgent yet effortless.
Drink Pairings
Cold Milk or Chocolate Milk
A tall glass of milk is a timeless match for this sweet, sticky dessert. For a double hit of chocolate comfort, pair it with creamy chocolate milk instead.
Espresso or Hot Coffee
A strong cup of coffee cuts through the richness and enhances the peanut butter flavor beautifully. It’s the kind of pairing that makes this dessert feel right at home on a cozy weekend afternoon.
Hot Cocoa
For an all-out chocolate lover’s fantasy, serve your Reese’s Peanut Butter Earthquake Cake with a mug of Hot Cocoa it transforms any bite into pure comfort.
Dessert-Inspired Drinks
Pair with a frothy caramel latte or peanut butter milkshake for a festive twist, much like the inventive sweet pairings found in Lemon Meringue Pie desserts where creamy meets tart.
Whether you serve it warm with melting ice cream or chilled beside a cup of espresso, this cake promises satisfaction in every form.
Top Tips for Perfecting
Even though this Reese’s Peanut Butter Earthquake Cake is famously foolproof, a few smart baking tips can help you capture that gooey, creamy perfection every time.
1. Use Room-Temperature Ingredients
Cold cream cheese or butter can make your filling lumpy. Bring both to room temperature so they blend into a silky, spreadable mixture that bakes evenly into the chocolate layer.
2. Don’t Overmix the Layers
The secret to those signature “fault lines” is restraint. Spoon the cream cheese filling in dollops and resist the urge to swirl it too much. The uneven mix is what gives this cake its rich, marbled look and texture.
3. Bake Until the Edges Are Set
Don’t rely on the toothpick test the molten center will always stick. Instead, check that the edges are firm and slightly pulling away from the pan while the middle jiggles a little. That’s when the cake is at its best.
4. Add a Pinch of Salt
A sprinkle of flaky sea salt right before baking (or immediately after) brings out the peanut butter’s natural flavor and cuts through the sweetness. It’s the same balance that makes salted desserts like Pineapple Cream Cheese Cobbler so satisfying.
5. Try Creative Add-Ins
Want to customize? Mix in chopped pretzels for crunch or drizzle a little caramel for an extra gooey twist. A few crushed peanut butter cookies on top can give it bakery-style flair.
6. Cool Before Cutting
Give the cake at least 30 minutes to settle before slicing. The layers need time to firm up otherwise, you’ll lose the signature swirl and creaminess that define this recipe.
7. For a Professional Touch
Cut slices with a warm knife (dip it in hot water and wipe between cuts). It creates clean edges that show off the marbled interior, perfect for serving or photography.
8. Reheat for Fresh-Baked Gooeyness
Warm leftovers in the microwave for 15 seconds to bring back that just-baked texture. It’s a trick I learned making reheatable favorites like the Chocolate Peanut Butter Bugles Recipe it refreshes the flavors beautifully.
9. Let the Imperfection Shine
Remember, this cake is called an “earthquake” for a reason. The cracks, bubbles, and uneven surface are its charm. Don’t chase perfection the rustic look makes it feel homemade and heartfelt.
Storing and Reheating Tips
This Reese’s Peanut Butter Earthquake Cake stores beautifully whether you’re saving leftovers or preparing it ahead for a gathering. The flavors deepen as it rests, making each bite richer and more balanced.
Room Temperature
If you plan to serve the cake within 2 days, simply cover it tightly with foil or plastic wrap. Keep it at room temperature in a cool, dry place. The texture stays soft and gooey, especially if your kitchen isn’t too warm.
Refrigerator
For longer storage, refrigerate the cake in an airtight container for up to 5 days. It will firm up a bit, giving it a decadent, cheesecake-like texture. When ready to enjoy, reheat each slice for 10–15 seconds in the microwave to restore that molten, creamy goodness.
Freezer
This cake also freezes well. Wrap individual slices in plastic wrap and then foil to prevent freezer burn. Store for up to 2 months. To serve, thaw overnight in the refrigerator, then warm briefly before eating. The gooey filling revives beautifully.
Reheating Tips
- Microwave: Warm a slice for 15–20 seconds for soft, fudgy results.
- Oven: For multiple servings, place slices in a 300°F (150°C) oven for about 10 minutes. Cover loosely with foil to prevent drying.
- Serve Cold: For a denser, candy-bar-like texture, enjoy it chilled straight from the fridge.
Bonus: Make-Ahead Magic
You can prepare the cake a day before your event. The flavors actually meld together overnight, making the peanut butter and chocolate even more harmonious. This trick also makes party prep stress-free just like baking favorites such as Old-Fashioned Chocolate Pie with Golden Meringue in advance.
No matter how you store or serve it, this cake delivers every time rich, moist, and bursting with Reese’s flavor.
FAQs
Can I use a homemade chocolate cake batter instead of boxed mix?
What makes it an “earthquake” cake?
Can I make this cake without cream cheese?
How can I make this cake even more peanut buttery?
Can I make Reese’s Peanut Butter Earthquake Cake ahead of time?
How should I serve this cake for the best texture?
Can I use different candies or mix-ins?
How do I know when it’s perfectly baked?
Can I use a different type of cake mix for Reese’s Peanut Butter Earthquake Cake?
How should I store leftover Reese’s Peanut Butter Earthquake Cake?
There’s a reason this Reese’s Peanut Butter Earthquake Cake has become a viral favorite it’s pure dessert drama in every bite. Those rich chocolate layers, creamy peanut butter swirls, and melty pockets of cream cheese come together like a warm, gooey hug on a plate.
The beauty of this cake is its imperfection cracks, bubbles, and all. Each piece looks different, but every one delivers that addictive mix of sweet, salty, and creamy comfort. Serve it at a birthday, potluck, or cozy family night it’ll disappear faster than you can say “Reese’s.”
If you loved this dessert, you’ll definitely want to check out my Cherry Pecan Cheesecake Lush a chilled, layered treat that’s as dreamy as it sounds.
For more sweet ideas and behind-the-scenes baking moments, follow me on Facebook and Pinterest.
So grab your mixing bowl, unwrap those Reese’s Cups, and get ready to bake a cake that literally rocks one sweet crack at a time.
Recipe Card
Reese’s Peanut Butter Earthquake Cake
Print recipe Save
- Prep time
- 20 minutes
- Cook time
- 50 minutes
- Total time
- 1 hour 40 minutes
- Yield
- 12–16 servings
Ingredients
1 box devil’s food cake mix (15.25 oz / 430 g)
1 cup whole milk (or water)
½ cup vegetable oil
3 large eggs
1 package (8 oz / 225 g) cream cheese, softened
½ cup unsalted butter, melted
½ cup creamy peanut butter
3 ½ cups powdered sugar, sifted
1 cup Reese’s Peanut Butter Cups, chopped
¾ cup Reese’s Pieces
½ cup peanut butter chips
½ cup semi-sweet or milk chocolate chips
Pinch of sea salt flakes (optional)
Instructions
- Step 1: Preheat oven to 350°F (175°C) and grease a 9×13-inch pan with butter or nonstick spray.
- Step 2: Combine cake mix, milk, oil, and eggs in a large bowl. Mix until smooth and glossy.
- Step 3: In another bowl, beat cream cheese, melted butter, and peanut butter. Gradually add powdered sugar until creamy and thick.
- Step 4: Pour cake batter into prepared pan. Sprinkle half of the candies and chips over it.
- Step 5: Drop spoonfuls of the cream cheese mixture on top do not spread. Sprinkle remaining candies over the surface.
- Step 6: Bake for 45–50 minutes, until edges are set and the center remains slightly gooey.
- Step 7: Cool for 30 minutes before slicing. Serve warm for molten texture or chilled for a fudgy version.
Notes
• Store covered at room temperature for 2 days or refrigerate up to 5 days.
• Freeze slices for up to 2 months; thaw overnight before serving.
• Best served warm with vanilla ice cream or whipped cream.
• For an extra twist, drizzle caramel or chocolate sauce before baking.
Nutrition
- Calories
- 520 kcal
- Fat
- 28 g
- Saturated fat
- 14 g
- Sugar
- 45 g
- Sodium
- 380 mg
- Protein
- 8 g
- Carbohydrates
- 60 g
- Fiber
- 2 g
Comments
Leave a comment